Handbuilt Frame Course
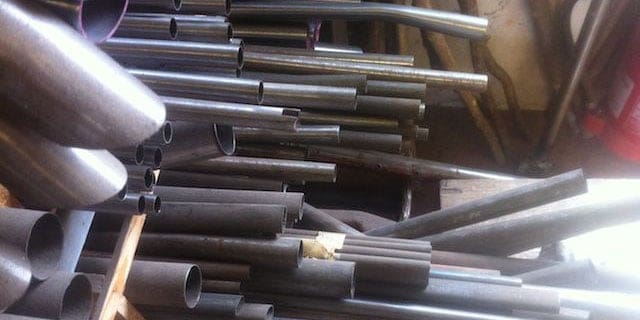
Fancy yourself as a useful mechanic? How about building your frame then? That’s exactly what Charlie Whitfield did, taking the raw steel tubing and learning to make a frame.
Dave Yates is a frame builder from the North East best known for setting up M. Steel Lightweight Cycles in Newcastle upon Tyne Geoff with Dobson and Joe Waugh where he and his team produced steel frames form many of the UK’s top racers. He has made frames for just about everybody during 30 years of building, including many custom frames for racers who were less than happy with their team kit (Dave has hand filed some interesting logos into his lugs over the years). An engineer by trade, he taught himself the art of frame building, which is not that unusual for frame builders, and he does things his way, again not untypical. Less typical is that Dave accepts that there are many correct ways to skin this particular cat and his way is the one that works for him (although we suspect that he knows damned well that his is the best way by far…).
Some time ago Dave and Debbie upped sticks and moved to Lincolnshire where Dave finally set up under his own name, just in time for the cycling boom! Now his workshop turns out Dave Yates custom steel frames and you’ll find a fair few of them hanging up in his workshop alongside numerous repair jobs and one-offs. The truly surprising thing about Dave is that nine times a year he turns his workshop into a classroom where, over the course of four and a half days, two bike will be built by rank beginners.
I had read about the course in Cycling Plus years ago, but I half forgot about it until Chris Wright phoned me up in Spring 2011 with the news that he had two places on the course for May 2012 and would I like one.
Definitely! Apart from anything else would make a grand 50th birthday present to myself.
What to build? At the time I had three steel bikes: a Surly Pacer (since sold), a Condor Acciaio and an Orange P7 mountain bike. On a business trip to New York I’d noticed a growing number of fat tyres city bikes. Not cruisers but bikes with proper road geometry in the main, flat-barred, some geared others not. I liked the look of the bikes for cities being built by the likes of Ezra Caldwell and Dave Sizemore. I started looking at sites like Cycle EXIF for ideas. Eventually I came up with the idea of building a flat-bar commuter around a fillet brazed frame. It would have disk brakes, a hub gear and maybe a dynamo hub at the front. And it would have big tyres.
Day 0 Observations:
- It’s a long way to Lincolnshire from South West London.
- Lincolnshire is very flat, something Bomber Command noticed in the war.
- If you see a Spitfire or a Lancaster, your getting close to Coningsby.
Day 1
We pitch up at Dave’s and meet the man himself. He’s quite a character, is Dave Yates. He has a huge number of stories to tell, and he’s got a great laugh. If you listen to his monologue on Rapha’s website, you’ll get a feel for the man and what he’s about. There are two thing I can say about Dave that matter here: he knows how to teach and he is very, very patient. He also lives at the end of the runway at RAF Coningsby, so teaching is frequently interrupted by passing aircraft of note (the Battle of Britain Memorial Flight is based there).
So we walk into Dave’s workshop and the first thing that you notice is the jig. This is “Jig Mark III” and our frames will be born upon it. 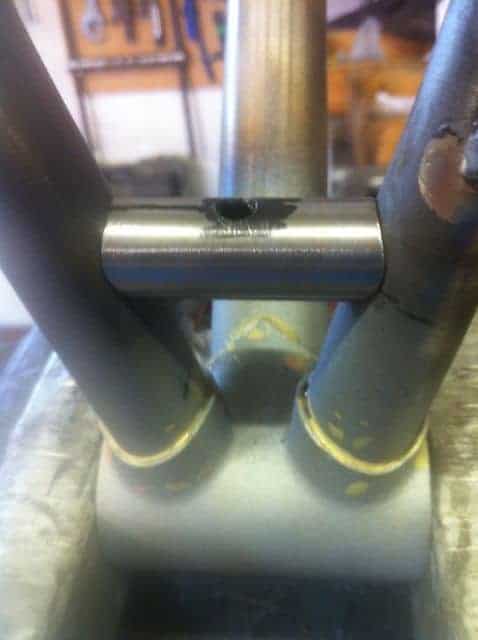 The next thing I noticed was a huge collection of screwdrivers that, on closer inspection, turns out not to screwdrivers but files of every size and cross section. Over the week I would come to know many of them. Finally, over in the far corner, I see a huge collection of tubing. There lie bicycles!
We settle down the first of countless cuppas and, almost straight away, we each have a box full of tubes (a bike!) and we have the torch in our hands for the first time in our lives to braze the seat tube to the BB shell. It is a welcome surprise to be getting into it so early.
My build would use sliding dropouts to accommodate the Alfine hub and carry the disc calliper. Slots are cut into the chain stays and the ends are filed ready to receive the dropout. The dropout tabs are sanded and flux is applied with a brush before brass is applied under the torch.
I brought dimensions with me from a fitting at Mosquito. Dave and I talked it through and made some adjustments, then the head tube and seat tube/BB were installed into Dave’s Mk III jig. The rest of the afternoon saw me start the process of filing the ends on the top tube to fit.The goal is to mitre each end so that the top tube will rest between the head and seat tubes pretty well unaided, with full contact at each end.
Tubes don’t come pre-mitred, you start with a straight piece of tube with straight-cut ends. You begin by making a V-shaped cut with the hacksaw then creating the curved mitre with a file. With Dave’s words ringing in my ears (“you can take away with the file, but you can’t put back”) the long process began. I would’t finish until the next day (it takes Dave about 5 minutes) but it is a curiously satisfying act to fashion complex joints from metal tubes using simple tools.
Day 2
One cup of coffee in and I got to my filing. Eventually, to my delight, the top tube was done! How on earth can filing a metal tube be so thrilling? By this stage the seat and head tubes are held by the jig and while the down and top tubes are held in place by gravity.
Next, I used a hacksaw to cut angled slots into the chainstay ends ready for the pre-cast dropouts. These get filed (as does everything) and then the chainstays were placed into the jig to see how things looked. Dave decided that they needed some shaping to accommodate my big tyres so he used a technique called “cold forming” (bending, to you and me) to give them a nice hourglass shape.
Torch time! Having filed all these tubes to perfection, comes the time to spoil everything. I actually found this moment quite sad, attacking my beautiful mitres with flame and brass, but that is the next step of the process. First the dropouts ends are sanded then tacked to the chainstay slots using brass rod. More brass is used to fill in any gaps, the molten metal’s meniscus making nice shapes in the rounded ends of the slots. Alignment is checked again (sliding dropouts must be parallel). Then the top tube is fastened to the head tube using a tack (basically a thin bead of brass running the entire length of the joint). Brass rod is applied under the flame under the watchful eye of Dave who provides a running commentary:
“get your brass in” “more flame” “chase the brass away!” (molten brass can be manoeuvred around the joint with judicious application of heat)
The result looks like an almighty mess, but the tacked joint is strong enough to ride on. The process is then repeated for the top tube/seat tube and down tube/head tube joints. The next step is to finish the brazing around the BB shell. We were using lugged shells, so the process is to fit the tubes into the lugs, apply flux generously and pile molten brass into the joint. Next the seatstays are mitred to fit, tacked to the dropouts, and tacked to the seat tube. Finally any gaps in the joints are filled. Your looking for an unbroken bead of brass around the entire joint. There were one or two gaps, but a quick application of flame to rod sees to that.
Another cup of coffee while everything cools and then the whole thing is lifted from the jig and, in my own hands, made with those same hands, is a bike frame!
Day 3
 We arrive to discover that Dave has grit-blasted our frames overnight. This removed the flux build-up and reveals the actual joints that I made the day before. All the fire and brimstone of a freshly-brazed joint is gone and everything is looking neat and tidy once more. The blasting leaved the tubing matt grey and reveals blobs of brass that will have to be filed away later. The neat-and-tidy look does’t last long because the next step is to create the fillets that will finish all the joints.
We start with a test joint. Dave hands me two pieces of tube and, by now, I know what to do. Hacksaw my V-cuts, file my mitres, tack the two together. Then build up the fillet, which is a step of brass that will encircle the entire joint. You start by laying down a starter blob, then one by one adding blob after blob around the joint, first one side then the other, until the fillet is complete.
“heat” “get your brass in” “more flame” “away, don’t over do it” “get your brass in” “done, file it!”
Now to my soon-to-be-close friends, the files. Fillet brazed joints are ugly lumpy things until filed. The smooth joints you see on fillet brazed frames are not made by machine, but are filed down by hand into smooth, curvy joints. That’s the theory. In practice the novice filer wields his tools with too much trepidation. You need to get stuck in, find the right file for the particular angle being attacked, and put some elbow into it. Finally the joint is treated to emery using a small belt sander which adds shine and a fantastic pallet of colours to the finished joint. The result is best savoured using a fingertip (I urge to lick is there, believe me!). The feeling is pure magic: solid metal rendered smooth and curvaceous. Fantastic!
And so the process is repeated for each of the main triangle joints followed by the seat cluster: “get your brass in”, “file it”. I find myself speeding up around the big joints only to be brought back to Earth at the back of the seat cluster – the job of filleting the seatstays is very tricky, a combination of confined space and narrow diameter tubing.
Day 4
The seat cluster is finished off and the (potentially endless) job of cleaning up continues. Dave warns that you could spend the rest of your life filing a frame to perfection but, while it is tempting to keep at it, there is still plenty to do before this frame is done.
There are bottle cage bolts to be drilled and braze-ons fixed, this time using silver rod (“be careful, it’s bloody expensive”), cable guides to be positioned, clamped, tacked on and filed. Then the seatstay and chainstay bridges need to be cut, mitred, drilled, braze-ons brazed on and filed. The seat clamp is tacked on. The rest of there day is spent tinkering with files. Filing, filing and more filing.
Day 5
Last half day. Nearly there!
The seat clamp that was tacked on yesterday needs a slot cut in it. The seatpost is drilled and the slot cut by hand (so that’s how you align it!) and filed. If there’s time, the dimples in the fillets can be dealt with. Next the excess tubing on the inside of the BB shell is reamed away, the dropout joints are filed, the odd blob of brass applied, filed again and sanded. Then the BB shell is faced (to make the surfaces of the shell absolutely true) and tapped (the thread for the BB is re-cut) using a special tool and brute force.
Naturally, there’s time for a bit more filing and sanding.
Finally, in a great ceremony, the serial number if stamped into the bottom of the BB shell: CAW20120528 – my initials and a mildly geeky way to write the date of my 50th birthday.
And that is that.
Conclusion
I left my frame with Dave to be painted. I flagrantly pirated the paint job of Ezra Cauldwell’s Hardass, because I like the bike and i love the work and words of its builder (sadly I am too tall to own a bike with the same proportions). The frame stayed at Dave’s for ages because I had to wait for Surly to make the Disk Trucker fork available. Meanwhile in SW14 a box full of components waited for 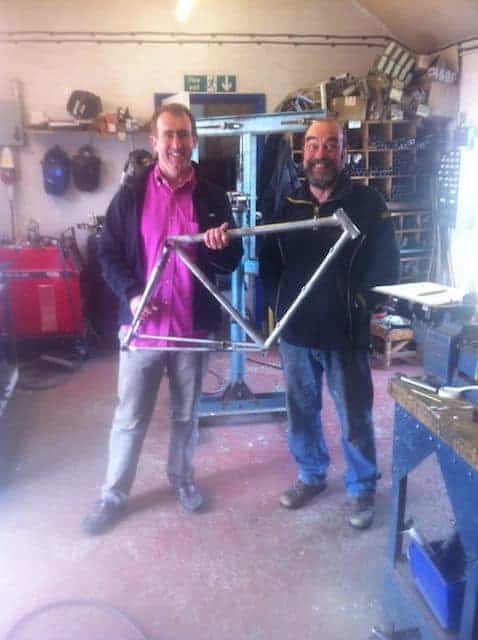 the frame to come home.
It arrived, I unwrapped it and began my inspection. Dave said that the meanest colour to paint a fillet brazed frame is non-metallic grey because it shows up the imperfections. My colour? Grey, in the main. On inspection, I’m very happy with my work. I’m also happy that the seat cluster escapes the grey, the most obvious signs of an amateur at work are there.
I built the bike up myself, having taken it to Pearson to have the headset cups pressed in. The only problem with the build was that the chainring would have snagged the chainstay (the chainstays are MTB-like, so a much smaller inner ring is expected). I remounted the ring on the outside of the spider and flipped the dished sprocket on the Alfine hub. This works (I’m sure that somebody at Shimano has done his homework because I don’t believe that this retains perfect chain line by coincidence!).
Aside from that, the only issue has been mounting the Alfine shifter with my Hope brakes. This is not as easy as it sounds because the Alfine trigger shifter bulges in all the wrong places and I ended up going with a Nexus 8-speed twist-grip shifter which had the double benefit of (a) fitting and (b) being only the 2nd ugliest component ever made.
So I have my own build, and I made a fat tyre-ed city bike. Is it any good? Well I think it is, but I would. I like looking at it too, but I would!
More importantly, would I recommend Dave’s course? Yes, yes, yes without a shadow of a doubt! You have to be quick to get a place, get yourself onto Dave’s mailing list and be ready to jump.
Specification:
Frame built by Charlie Whitfield:
- Reynolds 853 main triangle
- Reynolds 725 rear triangle
- Ceeway sliding dropouts
Bike fitted with:
- Fork: Surly Disc Trucker
- Headset: Hope
- Stem : Thomson X2
- Seatpost : Thomson Elite
- Handlebar : Ritchey Classic
- Brakes : Hope Tech X2 on 160mm Shimano SLX Rotors
- Saddle : Brooks Swallow
- Grips : Ergon GP1
- Crank : Shimano Alfine FC-S500
- Shifter : Shimano Alfine SL-S500
- Pedals : Shimano M324
- Chain : KMC X8-99 8s
- Front Light : Schmidt Edelux
- Rear Light : Knog Blinder
Wheels built by Harry Rowland:
- Front : Shimano DH-3D80 dynamo, Sapim spokes, Mavic OpenPro rim
- Rear : Shimano Alfine SG-S500 8-speed hub gear, Sapim spokes, Mavic OpenPro rim
- Tyres : Schwalbe Fat Frank 2.0